Create a Local Windows 10 Account
To create a local Windows 10 account, log in to an account with administrative privileges.
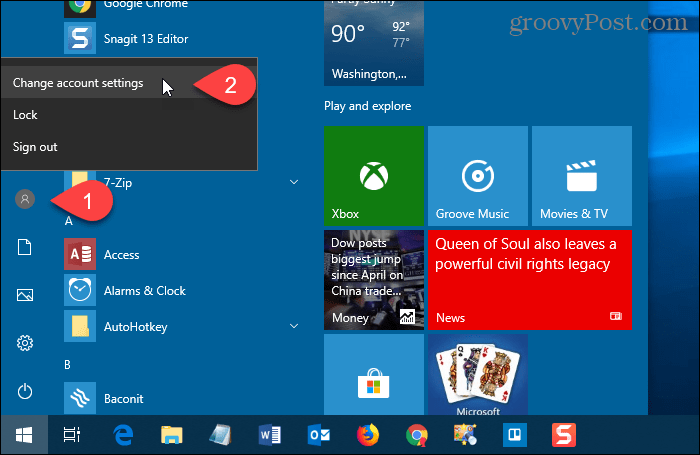
Open the Start menu, click the user icon, and then select Change account settings.
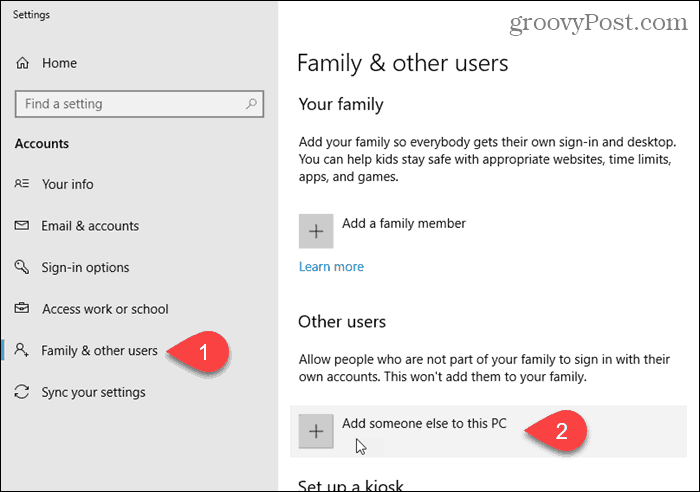
On the Settings dialog box, click Family & other users in the left pane.
Then, click Add someone else to this PC under Other users on the right.
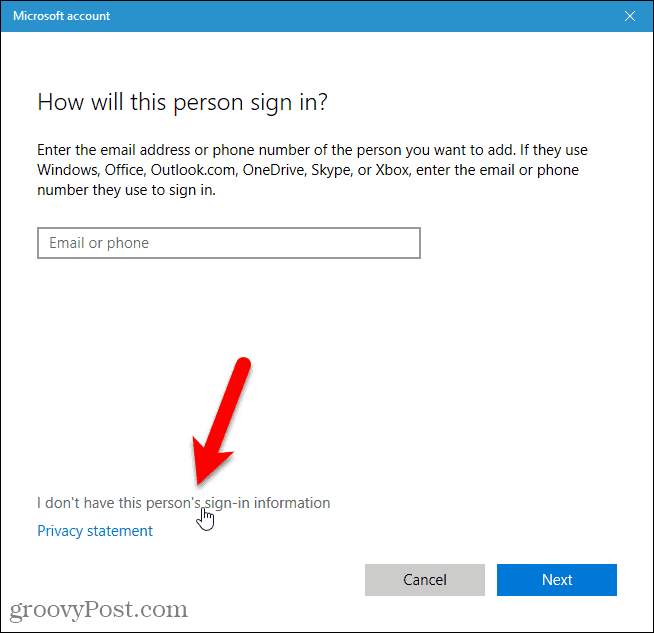
Do not enter an email or phone number on the “How will this person sign in” screen. Instead, click the “I don’t have this person’s sign-in information” link.
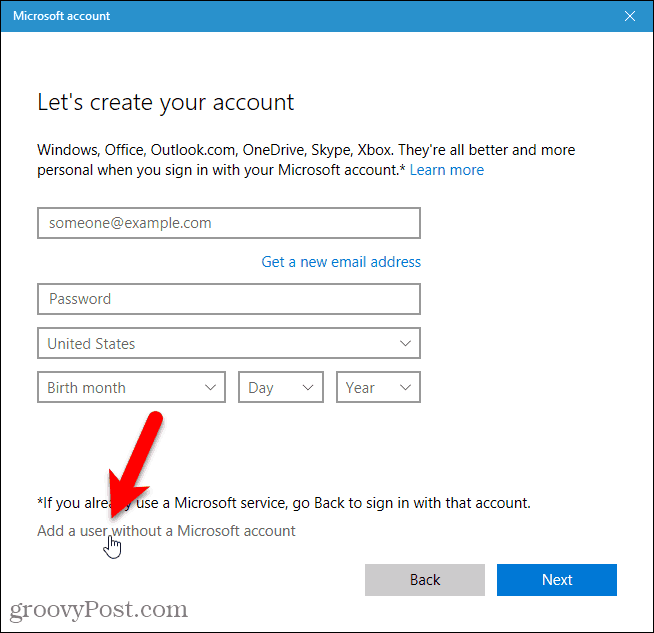
On the Microsoft account dialog box, click the Add a user without a Microsoft account link at the bottom.
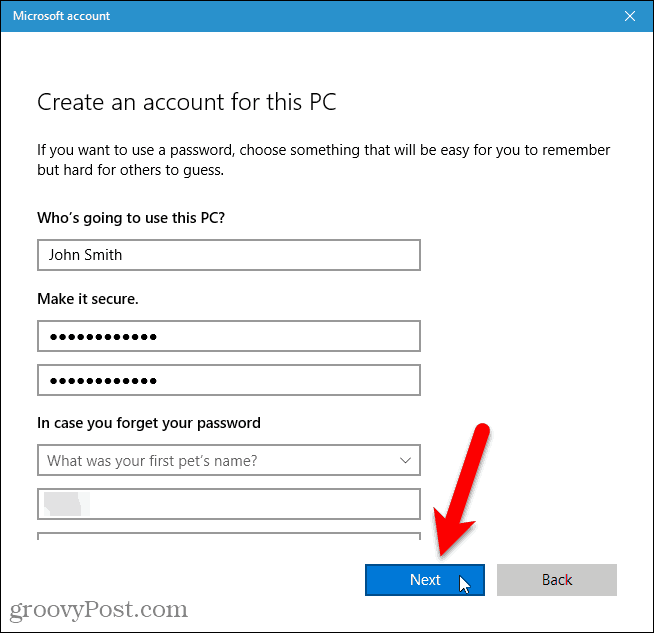
Enter the name of the user under Who’s going to use this PC and type the password twice under Make it secure.
Select three security questions and enter answers for them under In case you forget your password.
Then, click Next. Microsoft creates a new local account.
Switch to the New Local User Account
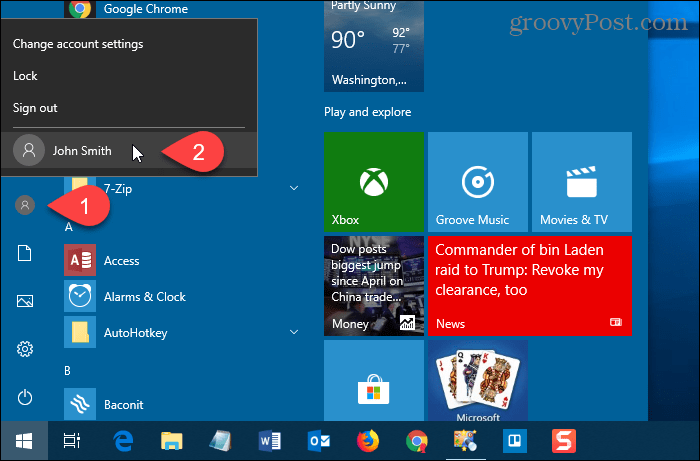
You can switch to the new local account without signing out of your current account.
Open the Start menu, click the user icon, and then click on the new local user name.
Log In to the New Local User Account
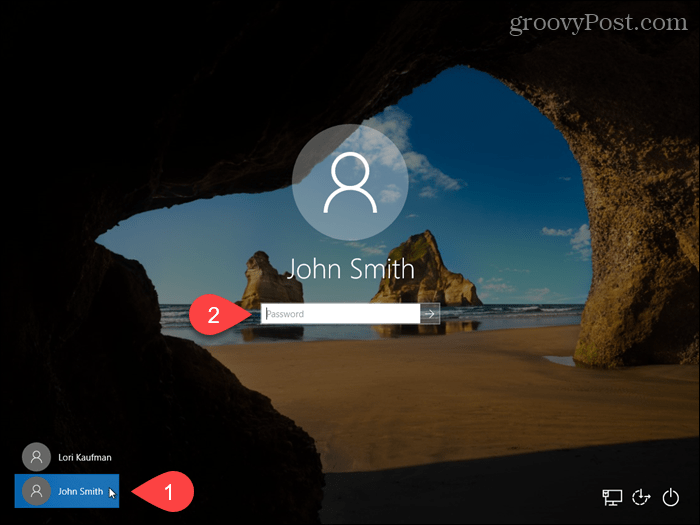
When signing in to the new local account, click the user name in the lower-left corner of the screen and enter the password.
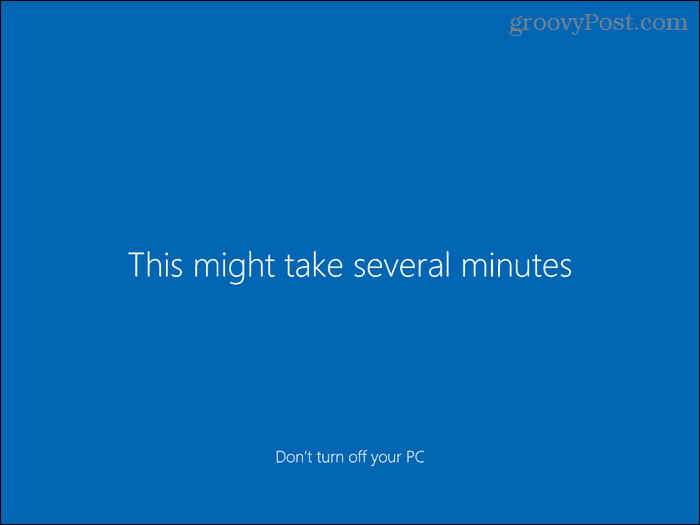
The first time you log in to the new local account, it takes some time for Windows to set up the account.
Change the Account Type for a Local User
When creating a new user account, it’s a Standard user account by default, which is better for security. You can change it to an Administrator account. But you should only do so if the account is for yourself or for someone you trust.
To convert a standard account an administrator account, open the Start menu and click PC Settings.
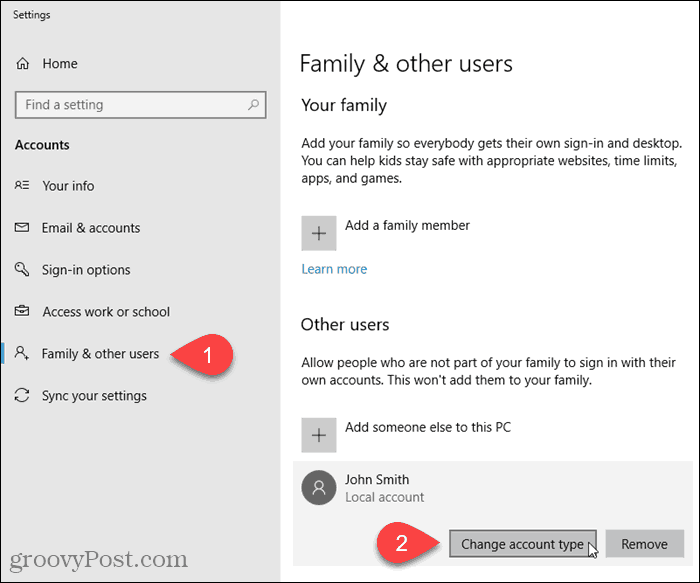
Click Accounts on the Settings screen and then click Family & other users under Accounts in the left pane.
Click on the Standard account name and click Change account type.
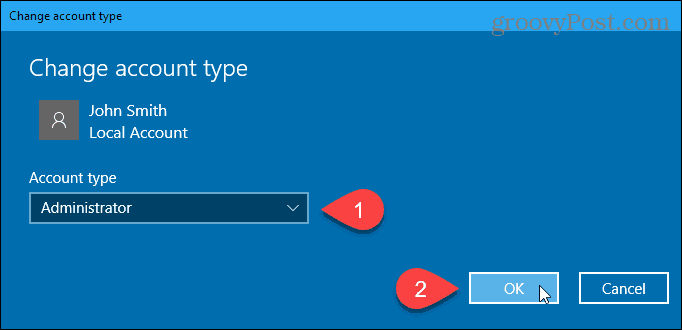
Select Administrator from the Account type drop-down list and click OK.
Remove a Local User Account
To remove a local Standard or Administrator account, open the Start menu and click PC Settings.
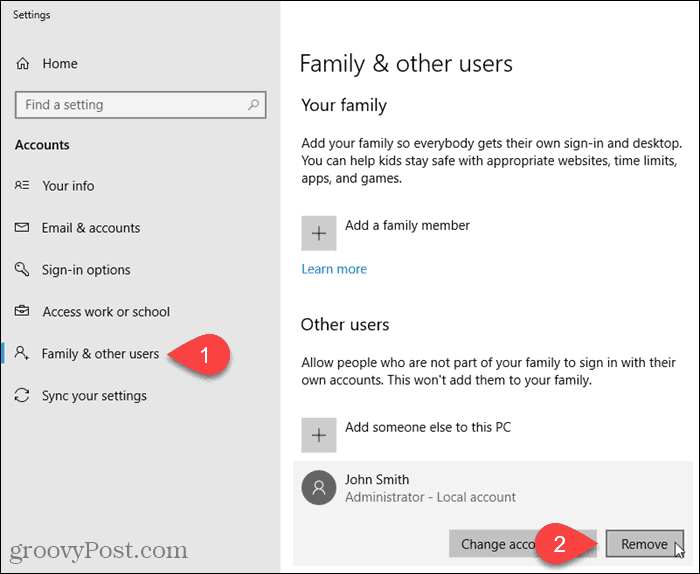
Click Accounts on the Settings screen and then click Family & other users under Accounts in the left pane.
Click on the Standard account name and click Remove.
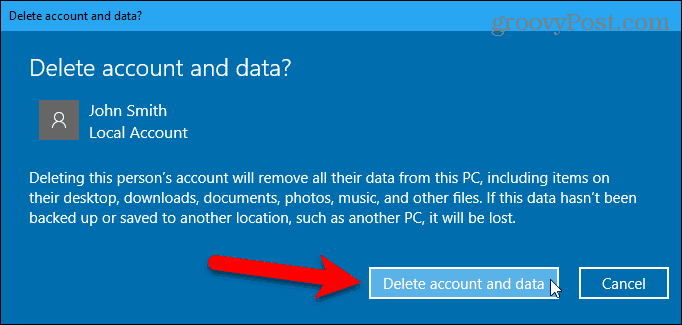
When you delete a user account, all their data is deleted. If you don’t want to lose the data make sure you back it up before deleting the account.
If you’re sure you want to delete the account, click Delete account and data on the Delete account and data dialog box.
Convert a Microsoft Account to a Local User Account
If you initially signed in to Windows 10 using your Microsoft account, you can convert it to a local user account should you want to.
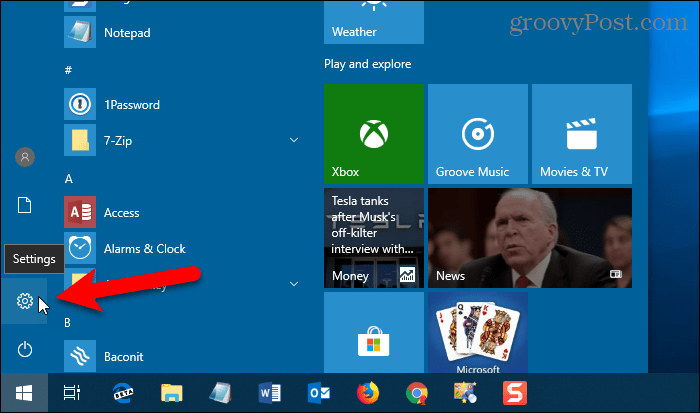
To convert a Microsoft account to a local user account, open the Start menu and click PC Settings.
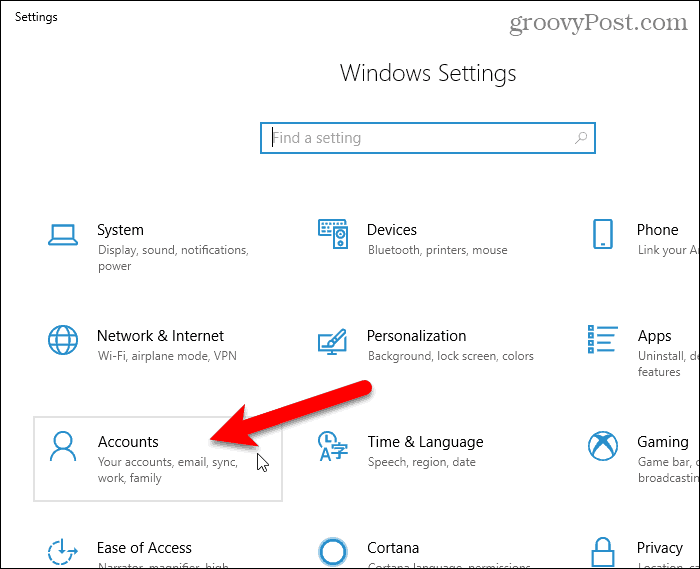
Click Accounts on the Settings dialog box.
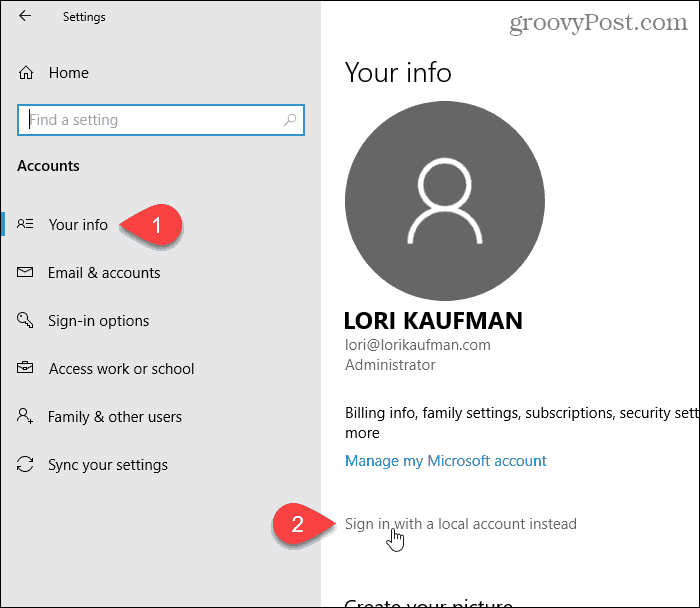
Click Your info on the left pane.
Then, click Sign in with a local account instead link on the right.
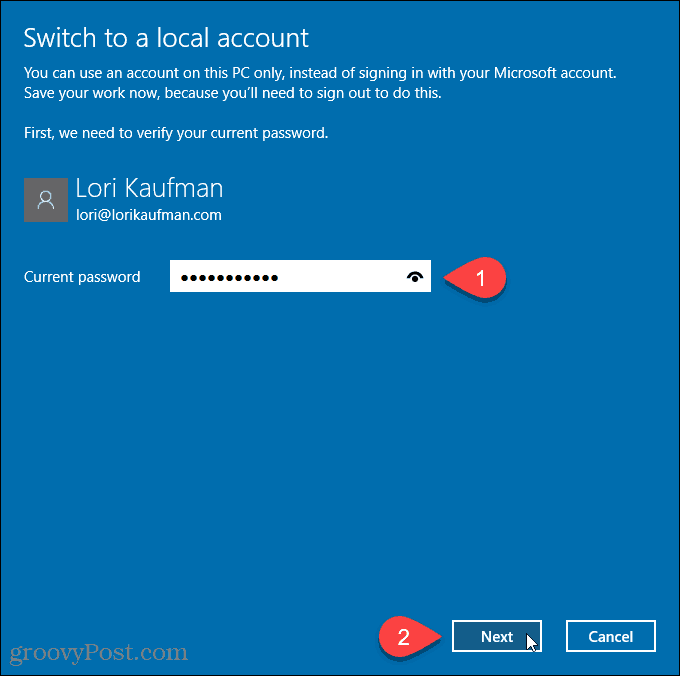
Enter the password for the Microsoft account in the Current password box.
Then, click Next.
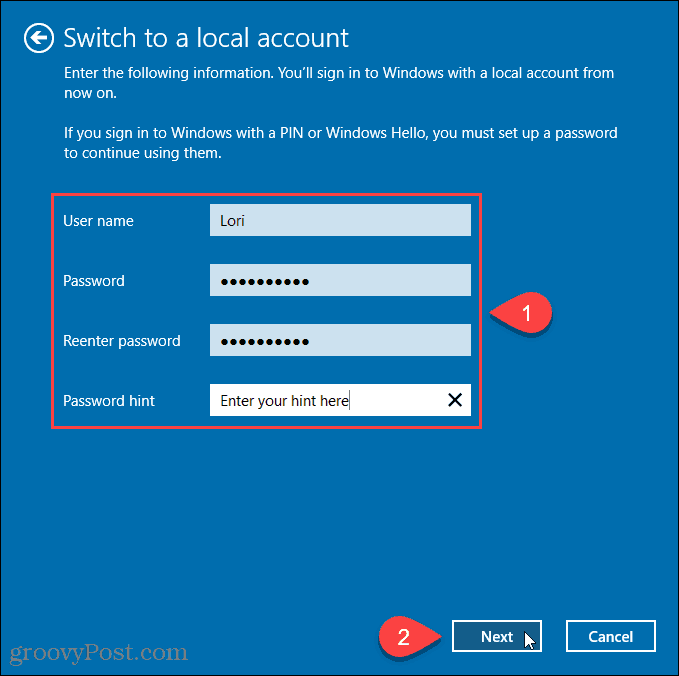
Enter a User name for the local account. Then, enter a Password and Reenter password.
Add a Password hint if you want to help you remember your password.
Click Next.
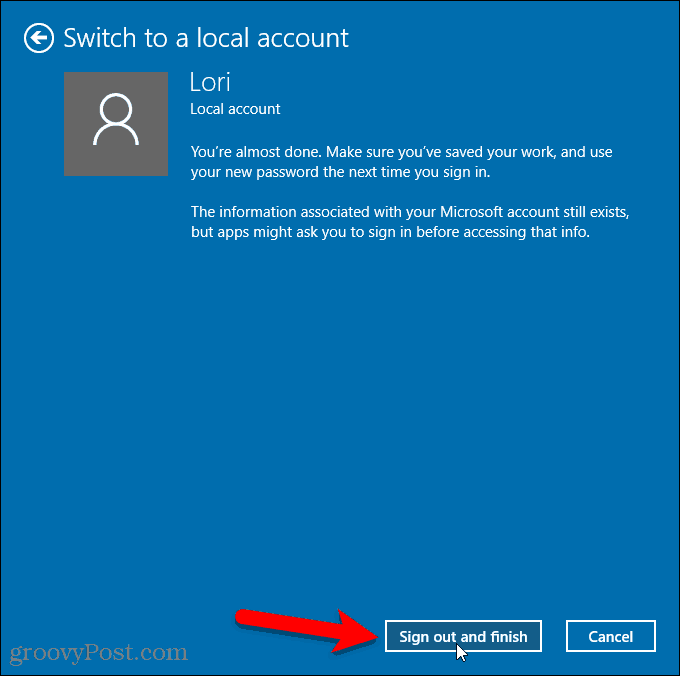
Click Sign out and finish.
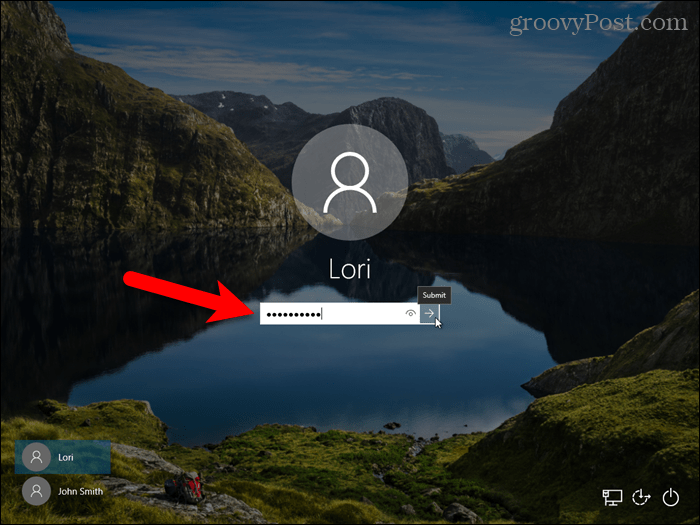
Now click your new local user account name in the lower-left corner of the login screen.
Then, enter your new password.

Sorry, the comment form is closed at this time.